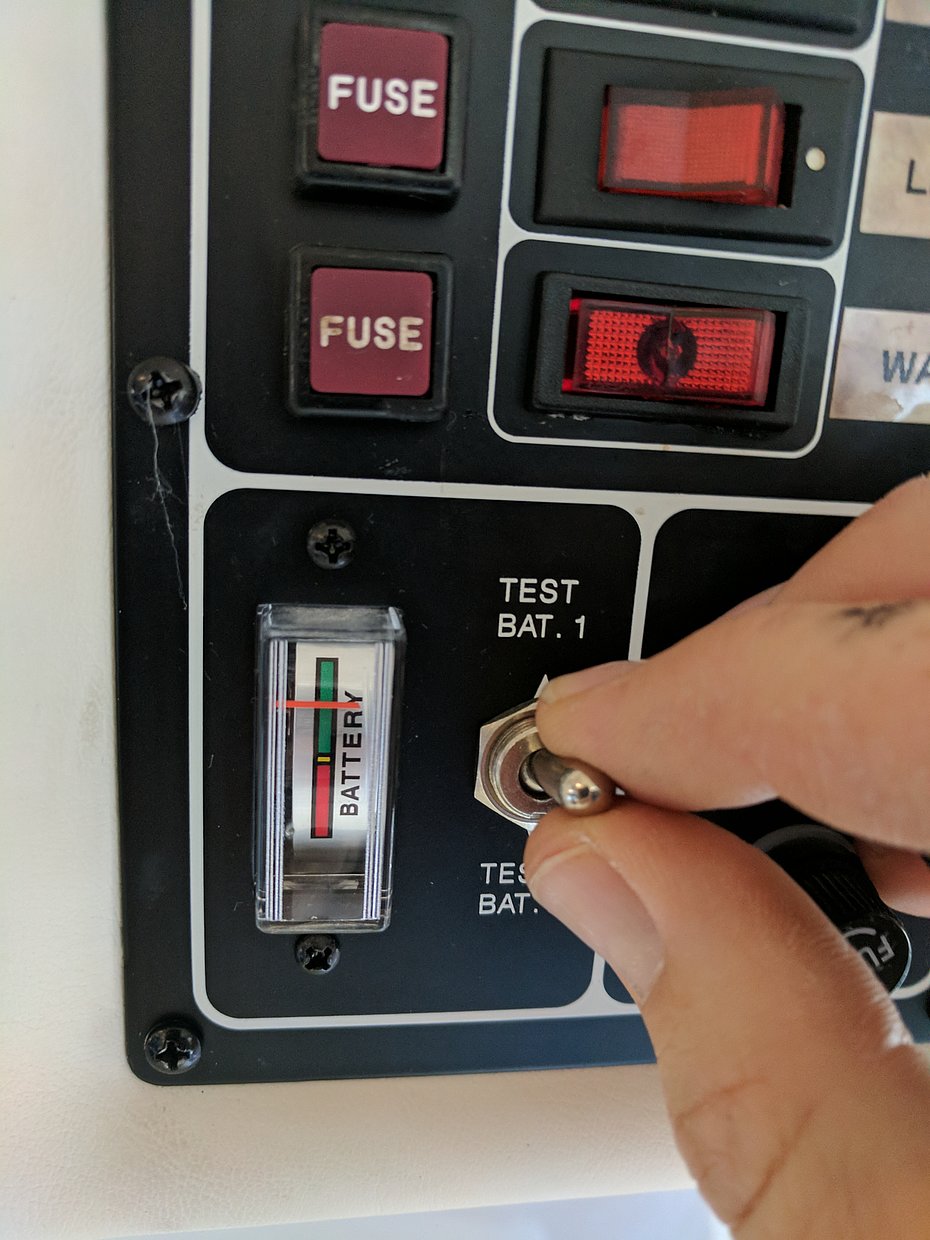
Checking your caravan batteries every 12 months is good practice and will help to avoid that flat battery scenario of warm beer and spoiled food. Do you have a built-in voltmeter, or battery monitor? If so, it’s a good starting point, but can be very misleading.
Most battery gauges simply show you the voltage of the entire battery bank. This is a guide only, and does not show you the quality of the battery condition. If you have a battery monitor (which we highly recommend), where you get a % reading, this gives you better accuracy, but still requires further regular checks.
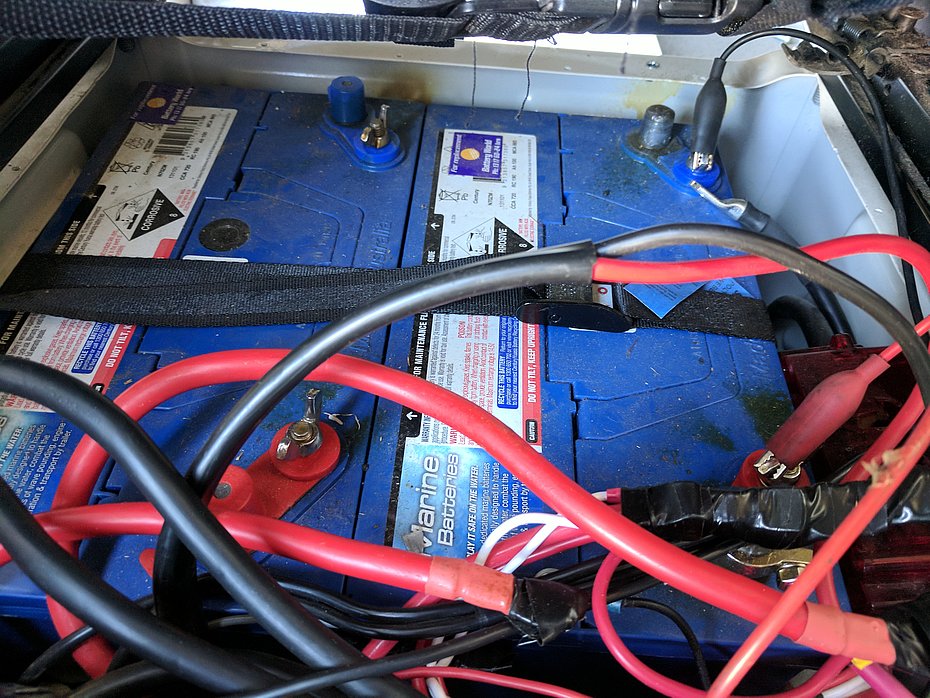
- Step 1. Locate your battery compartment. Often they are in the front boot, under the bed, or mounted on the exterior of the chassis on the side of the van.
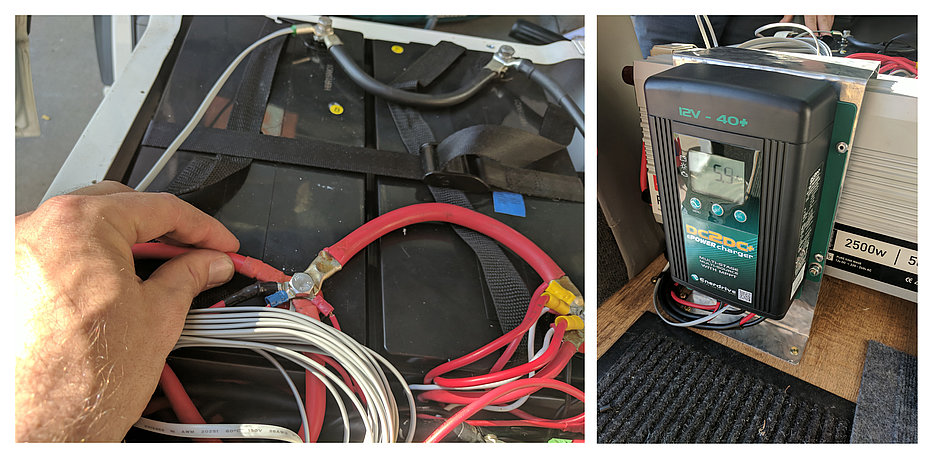
- Step 2. Perform a charging check – Plug your van into 240V mains power, and let the battery charger run for a few hours. Carefully touch the cables that connect the battery charger to the batteries. They should NOT be warm/hot. If they are, you have wiring/installation issues.
- Step 3. Test the voltage/condition of each individual battery. To do this, first disconnect your van from mains power, and disconnect any inverters. Then disconnect ALL the cables off the batteries. Be careful to label or remember where they connect back to. As you take the cables off the batteries, tape them up with insulation tape so they don’t short out.
- A quality battery installation will only have 1-2 connections on each battery. If you have piles of connections, its a recipe for disaster as its difficult to get good connections, and troubleshooting becomes much more time consuming. (As an aside, where you need multiple connections, this is an example of a quality setup.)
- Step 4. Physically check the battery – if there are any bulges or cracks in the battery itself, corrosion marks, liquid stains – they are all indicators that there are major problems. Be careful as if a battery is leaking acid, it will hurt your skin, damage your clothing etc.
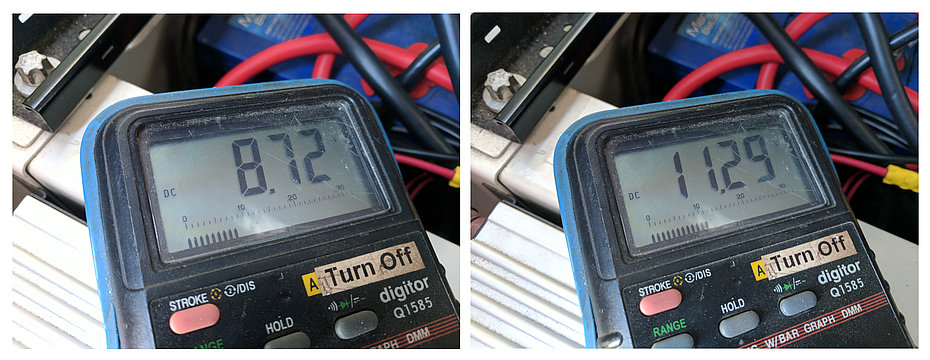
- Step 5. After having disconnected all cables from all batteries, you can then test each individual battery’s voltage. To do this you will need a multi-meter – set to voltage (DC) reading. A multi-meter is a handy tool to have with you during your travels. Step 6. Test each battery separately. You will see in this example, that we have a reading of 8.72V from one battery and 11.29V on the other. This van has problems for a number of reasons:
- The voltage on the batteries are different. Batteries in a bank (connected in parallel) should always be maintaining the same voltage across all batteries. This example indicates the 8.72V battery is well damaged.
- The other battery at 11.29V is VERY flat and probably needs replacing too.
- You see in the first photo looking (above top left) at the battery meter, that the gauge is well in the green zone – however, these batteries are completely stuffed. The misleading monitor has lead to extreme overuse and damage to the batteries.
Based on the above results you can be confident at least one of the batteries is completely dead, and the other one is on the way. They both need replacing. You should ALWAYS replace ALL of your batteries at the same time. Don’t mix and match different ages (or different types) of batteries.
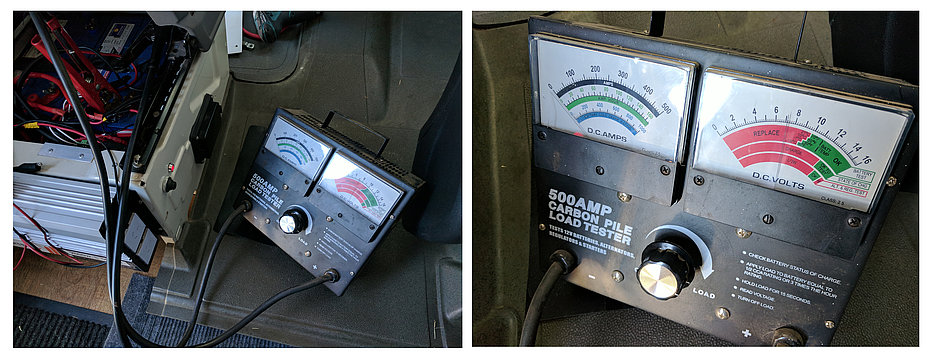
As an additional test, professional service centres should do a full load test on each battery individually. Using a special device, we put a high load on the batteries and check the ability for the battery to deliver the current, while retaining its voltage. In this case, one battery is not providing ANY current, while the other one is struggling.
This is a classic case of what happens with many battery banks (where you have more than one battery). One battery fails – due to age, condition, mismanagement etc – and the other battery ends up working twice as hard. You don’t know this is going on because the meters only look at the battery bank as a whole. Letting this persist simply puts extreme demands on the single battery that is still working, and actually CAUSES it to fail.
The resolution in this example is to replace BOTH batteries (while also upgrading from calcium types to high quality AGM batteries), repairing many of the cables with faulty crimping, fit a DC-DC charger for better quality charging while driving, and re-program ALL chargers to suit the new battery type and capacity.
If you test your batteries at home and have any concerns give us a call at the RV Service Centre. We can perform an advanced battery test for you and ensure that your battery set-up is working optimally.